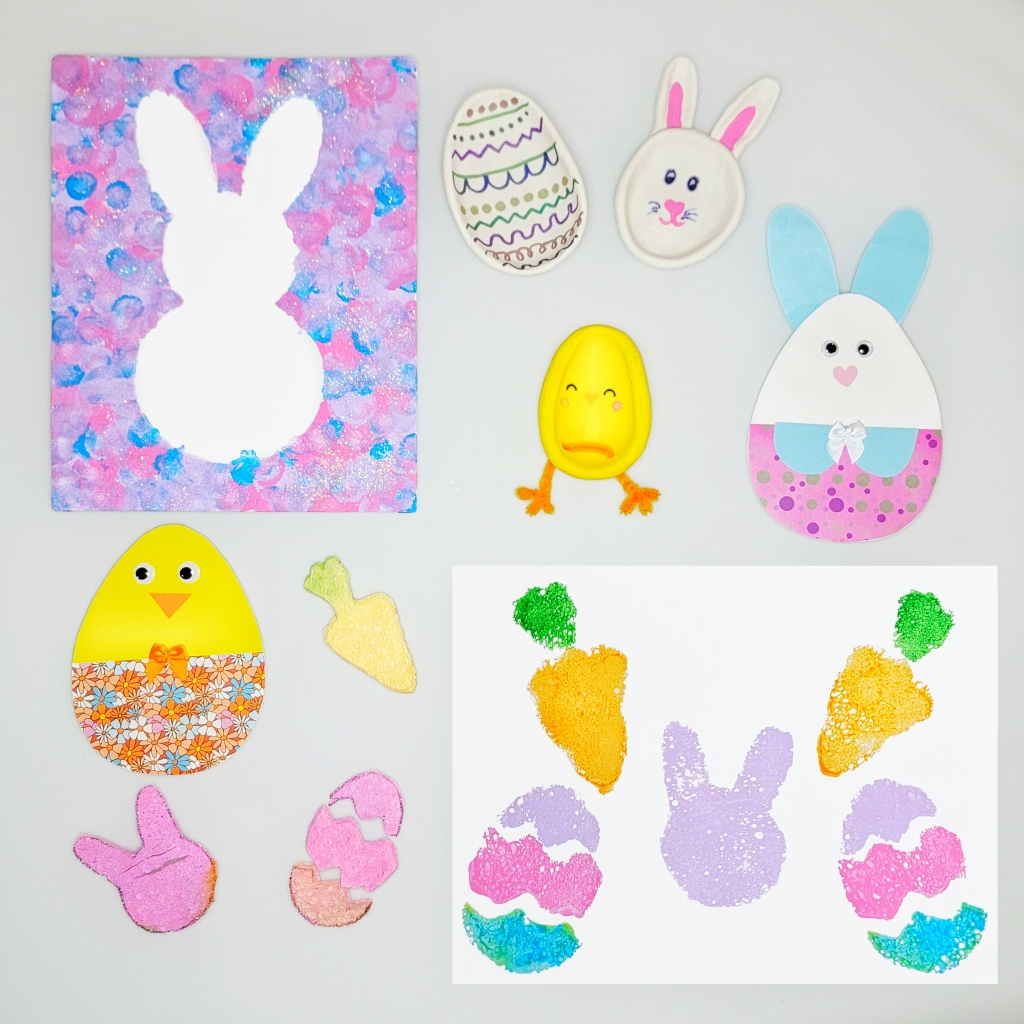
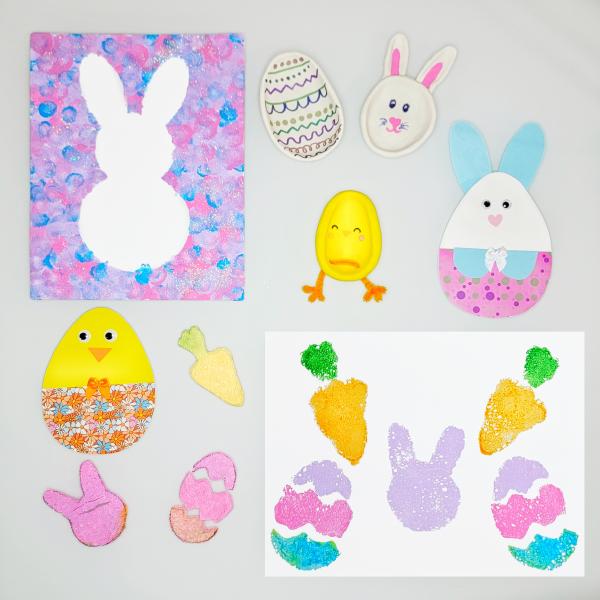
Spring will soon be here! Celebrate the season with these five Easter crafts for kids. Each of these projects gives kids the opportunity to work with a different kind of art. There’s painting, stamping, paint-resist, clay, and more! Plus, we’ve included FREE downloads that make it a cinch to prep each project. Let’s get started!
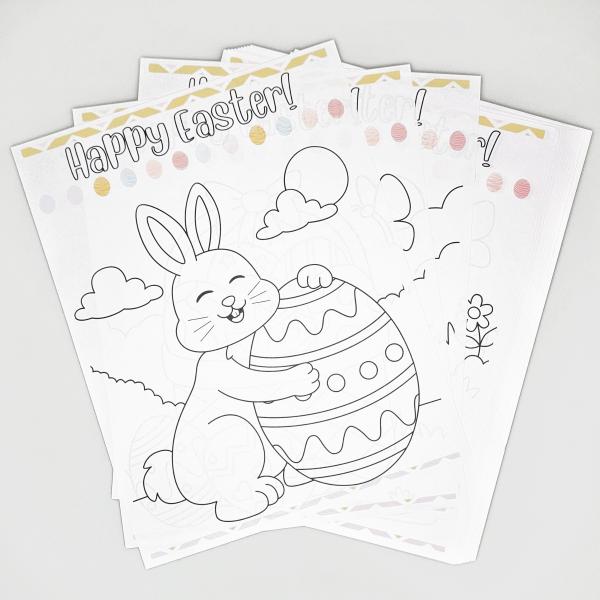
Download and print these Easter coloring pages for kids, and you’ll have a quick and easy art activity ready to go! You’ll get 15 different coloring pages full of adorable bunnies, baby chicks, and springtime scenes. Use crayons, colored pencils, or markers to add color!
Pick up a few extra sponges and turn them into a creative tool with this Easter craft for kids!
What You’ll Need:
FREE Easter shapes printout, plain sponges, permanent marker, scissors (adult use only!), paper plate, paint (tempera or acrylic), white cardstock, paintbrush (optional)
What You’ll Do:
1. Download and print our FREE Easter shapes printout. This will give you three designs for your sponges.
2. Cut out the shapes. Lay one shape on top of a sponge, and use the permanent marker to trace around it. Repeat for the other two shapes.
3. Follow the shapes you just traced to cut out the sponges. Depending on the thickness of your sponges and the strength of your scissors, this can be a bit challenging. We recommend that an adult perform this step.
4. Pour paint onto a paper plate. Dip a sponge into it and then press the sponge onto the paper. If you’d like to use multiple colors on the sponge, use a brush to apply paint to each area.
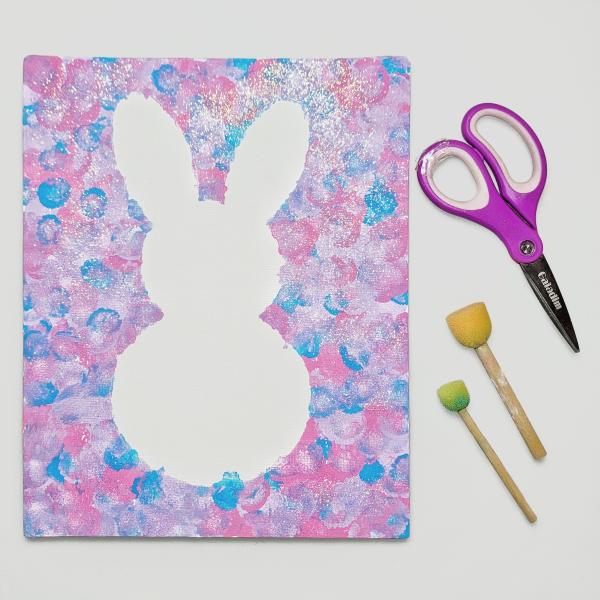
Kids of all ages love the magic of paint-resist! Their random dabs of paint become a beautiful piece of art as a white bunny is revealed in the final step.
What You’ll Need:
FREE Easter bunny template, scissors, painter’s tape or washi tape, mini canvas, something to use for stamping (cotton swabs, round sponge paintbrushes, or fingers!), tempera or acrylic paint, paper plate
What You’ll Do:
1. Download and print our FREE Easter bunny template. Cut out the bunny and use tape to attach it to the canvas. You’ll need to loop the tape and place it under the bunny so that no tape extends beyond the bunny. Try to make the bunny as secure as possible, creating a crisp edge so no paint gets underneath it.
2. Pour your paint onto a paper plate. Dip a cotton swab, round sponge paintbrush, or a finger in one color and dab it on the canvas. Use a variety of colors and dab all around the canvas. Continue doing this until you’re happy with how the canvas looks.
3. Allow the paint to dry. Then remove the paper bunny and you’ll see a crisp white bunny on the canvas!
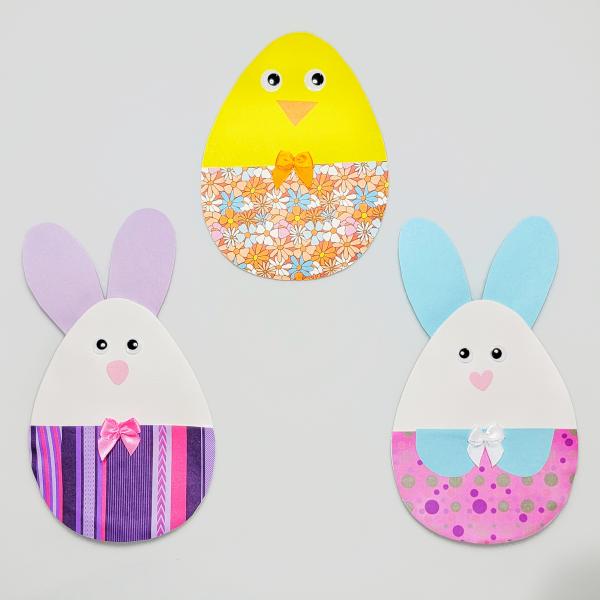
Start with a few foam Easter eggs and let your children’s creativity soar!
What You’ll Need:
EVA foam (craft foam) in the shape of Easter eggs, decorative cardstock or scrapbook paper, googly eyes, construction paper, glue, scissors, ribbon, feathers, and other decorating supplies
What You’ll Do:
This project is totally open-ended! Just take a foam Easter egg and decorate it like a baby chick or a bunny.
To make clothes, you can trace the egg on your paper, cut it out, and trim it down to size. Add ribbon, glitter stickers, or other decorations to make them fancy!
You can also make ears and noses from construction paper. Add googly eyes for a fun touch!
When you’re finished, you can glue them onto sturdy paper to display them or let your children play with them. Glue them onto popsicle sticks to create fun Easter puppets!
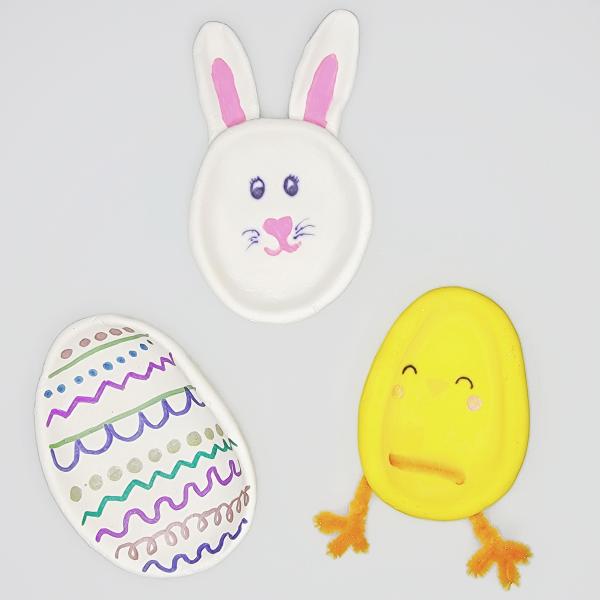
Kids’ fine-motor skills will get a workout as they shape these pinch pots. When they’re finished with this Easter craft, they’ll have a great gift for a friend or family member!
What You’ll Need:
Parchment paper and tape or a silicone mat, air-dry clay, drying rack, acrylic paint and paint pens, paintbrush, paper plate, Modge Podge or other type of gloss (optional)
What You’ll Do:
1. Protect your table by taping down a piece of parchment paper or laying down a silicone mat.
2. Start with a large section of clay. Roll it into a ball. Insert your thumbs into the middle of the ball and press them out toward the edges, pinching and pushing the clay as you go. Keep working in this pinching motion until your clay resembles an oval for an egg or a circle for a bunny’s face. If you’re making a bunny, make two additional pinch pots that look like long ovals. Pinch them together with the face so they look like ears.
3. When you’re happy with the shape, set it aside on the drying rack for one or two days.
4. Pour acrylic paint onto a paper plate and paint your pots. Paint pens are helpful for creating small details.
5. If you’d like, you can also paint your piece with glossy Modge Podge or another glossy acrylic sealer.