You and your children can take an in-depth look at the work of three African American artists with these Black History Month art projects! Learning about these artists gives kids a chance to study history, appreciate a new kind of art style, and see what determination and a passion for art look like in the real world. For each artist, we’ve provided a biography, a book recommendation, and an art project. If you’d like to extend these Black History Month art projects, we suggest looking for informational videos online and checking your local library for additional books.

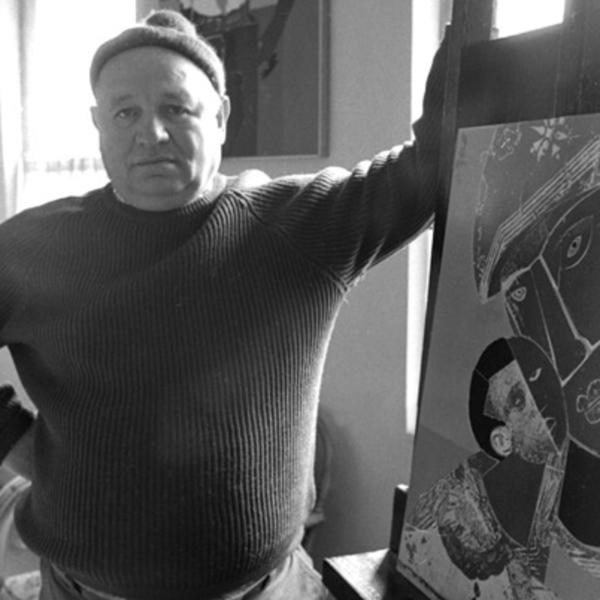
Romare Bearden was an artist, but he was also a social worker, a soldier, a songwriter, a costume designer, and an illustrator. He was born in 1911 in North Carolina. However, his family moved to Harlem when he was three years old. They were being treated unfairly in North Carolina and moved to Harlem in order to avoid racial discrimination. His mother became the editor of a well-known African-American newspaper, so their family was friends with musicians, artists, and writers who were popular at the time. Bearden also spent time in Pittsburgh with extended family. In fact, that’s where he first fell in love with art. After he graduated high school, he took art classes and graduated from New York University.
By the 1940s, he was painting bold abstract pieces. Although he served in the Army from 1942 to 1945, he still pursued his passion for art. He traveled and studied in Europe in the 1950s. After that, he became a songwriter. In the 1960s, he founded a group of African-American artists called Spiral. These artists were dedicated to the civil rights movement. Through these meetings, Bearden was inspired to create collages made from magazines and newspapers. He would go on to design collages for the next 30 years. Collage became his signature art technique and art critics loved his creations. Romare died in 1988.
Image credit: Romare Bearden Foundation
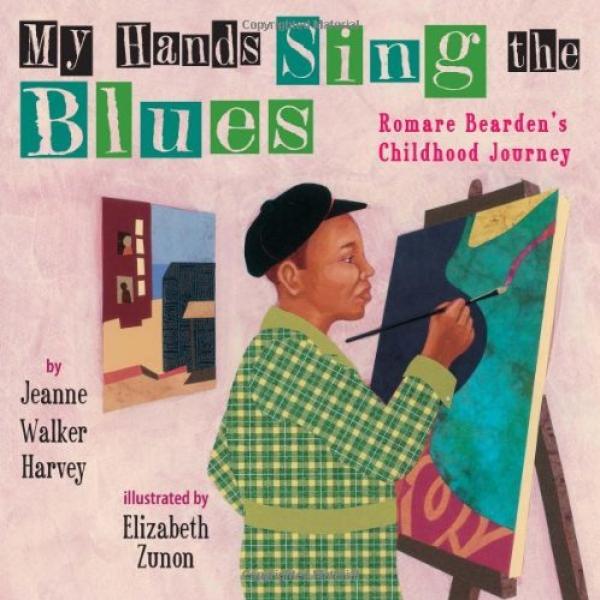
By Jeanne Walker Harvey
This book highlights Bearden’s African and Cherokee heritage, his love of trains, and his passion for jazz music. Even the illustrations are a tribute to Bearden. The illustrator has used painted scenes and collage techniques. The text bounces along like a jazz tune, bringing energy and life to the art. Children 4-9 years old will love the spirit and sense of adventure in this book.
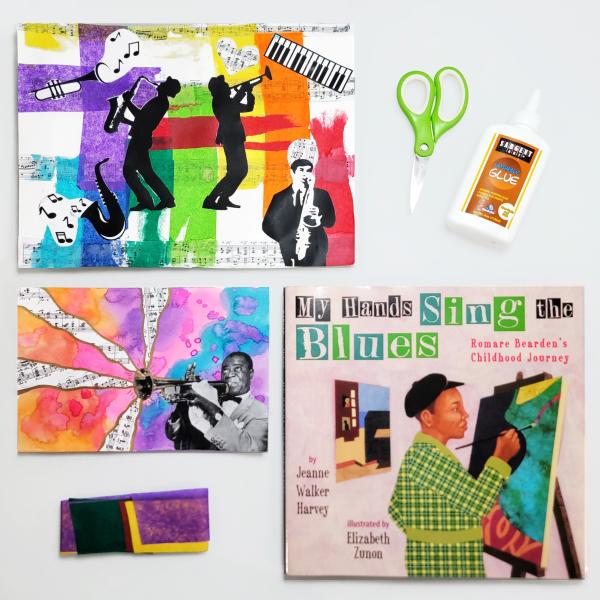
This craft project combines two of Bearden’s passions: jazz music and collage! It’s a very open-ended project, so kids can get as creative as they like!
What You’ll Need:
FREE download of collage images; Glue; Watercolor paper; Watercolor or tempera paint; Tissue paper or bleeding tissue paper; Paintbrush; Scissors; Metallic marker (optional)
What You’ll Do:
1. Download and print the collage images.
2. Cut out the people and instruments. Then decide how you’d like to cut out the music sheet. You can cut it into shapes, rows, wavy lines, or whatever you’d like. (There are enough images to make at least two collages.)
3. Use your creativity and plan your collage! Here’s one idea: Cut the sheet music into rows and glue the rows to the watercolor paper. Then tear or cut up a bit of tissue paper and glue it on the collage in different directions. Glue the music images wherever you’d like!
Here’s another idea: Start by painting the watercolor paper. You might use the wet-on-wet watercolor technique. (Paint the paper with water and then paint with watercolors.) Or, you might want to mix up the colors in certain areas. If you use tempera paint, you might gently splatter drops all over the paper. It’s up to you! Once the background is dry, add the images to your collage. You could cut out Louis Armstrong and his trumpet. Then cut the music sheet into wavy lines and align them to look like they are coming out of his trumpet.
4. If you’d like, use a metallic marker to embellish your collage.
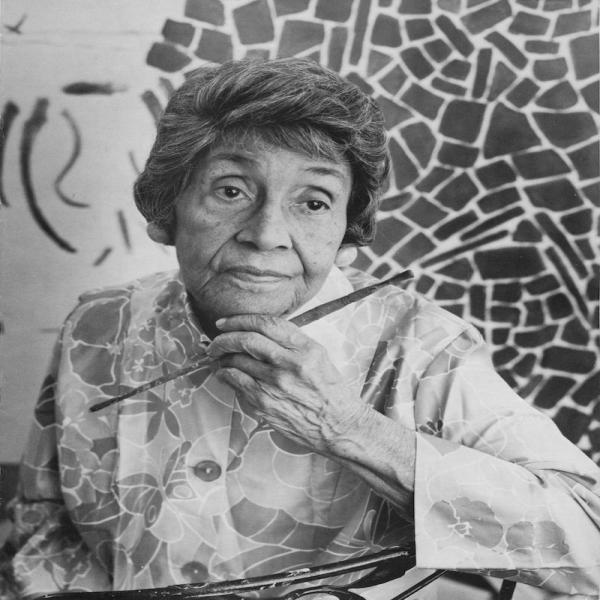
Alma Thomas (1891-1978) always had a passion for art, but didn’t make a career of it until she was 75 years old. Like Bearden, Alma Thomas was born in the South, but her family moved North in an effort to escape racial discrimination. Her family settled in Washington, D.C. As she grew up, she was interested in becoming an architect. She graduated from Howard University in 1924—the first woman to ever receive an art degree from that school. She began teaching at a middle school shortly after that. For 35 years, she taught school as a full-time job and painted in her free time.
Thomas held her first art exhibit in 1966 when she was 75 years old! Her work is abstract, bursting with expression, and full of color. Some of her paintings were inspired by her garden and the view out of her kitchen window. She was also inspired by Henri Matisse.
Even though Thomas painted during the civil rights movement, she didn’t like to be called a “black artist.” She simply wanted to be known as a painter and as an American, and for her artwork to move beyond the labels of gender and race. She died in 1978. But the power of her work has endured well past her death. In 2015, Thomas’ painting Resurrection was acquired by the White House, making her the first black woman to have a piece of art in that collection.
Image credit: The Phillips Collection
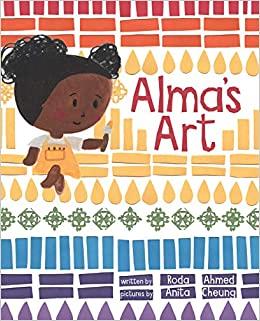
By Roda Ahmed
This story is roughly based on Alma Thomas’ artistic style. Preschoolers will love the bright colors and cute characters. It provides a nice introduction to brushstrokes, color, and artistic imagination.
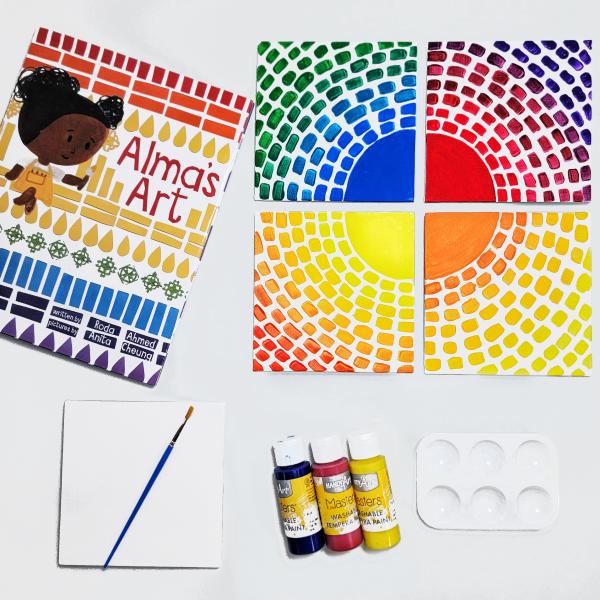
In this painting project, young artists can jump into bright and colorful artwork just like Alma Thomas!
What You’ll Need:
4 pieces of square cardstock or canvas; Tempera or acrylic paint; Paintbrush; Jar of water; Paper towels; Paint palette or paper plate; Ruler; Pencil
What You’ll Do:
1. In the last step of this project, you’ll be joining all four pieces of cardstock together to create one big circle. But to start, you’ll be painting them separately and each one will begin with a quarter circle.
2. There are two ways to create the quarter circle on each paper. One way is to measure with a ruler. Take one corner and measure 2 inches off each side. Mark each spot with a small dot. Draw a curve to connect the two dots and you’ll have a quarter circle. For younger children, you may prefer a tracing method. Set all four papers in one large square on your work surface. Find a circular object and set it in the middle of the large square. Trace around it and you’ll have a quarter circle on each square paper.
3. Now it’s time to paint! Pick one piece of square paper and two paint colors. Let’s say you choose orange and yellow. Start by painting the entire quarter circle orange. Then paint two or three rows of quick brushstrokes in orange paint around the quarter circle.
4. Next, mix a bit of yellow into the orange. Then paint two more rows of quick brushstrokes. Mix in more yellow paint and continue this process until your last rows are completely yellow!
5. Repeat this process with the other pieces of square paper, but use different colors. Try red and purple or green and blue! When you’re finished painting, set everything aside to dry.
6. When the paint is dry, align the papers so they form one big square with a painted circle in the middle! You can tape the back of the pieces together or display them on a background piece of paper.
Adapt It For Younger Children
Simply trace a circular object in the middle of a piece of cardstock. Paint the circle any color. Then add quick brushstrokes around the circle in any colors you’d like!

The handmade quilts from Gee’s Bend, Alabama, didn’t become famous until 1998, but their history goes all the way back to the early 1800s. This small rural town is named after Joseph Gee, a man who owned a large cotton plantation during that same time. “Bend” is in the town’s name because the community sits on a deep bend in the Alabama River. Gee owned nearly 50 slaves and even after they were freed, these African Americans still faced serious hardships.
Through all of this, the women began a tradition of quilting. They would use old work clothes, fabric scraps, and even feed sacks to create quilts that could keep their families warm. (Most of their homes had no heat.) But, they didn’t create ordinary quilts. Their quilts are incredibly original and feature unexpected patterns and color combinations! Many in the art world compare the quilts to abstract paintings. Their quilts tell stories too. Some are about family members, some are about the struggles African Americans have faced throughout history, and others are about the joy the women have despite their circumstances.
In the 1960s, during the civil rights movement, local women formed the Freedom Quilting Bee. Their goal was to sew and sell quilts in order to become financially stable. Then in 2003, a group of local women founded the Gee's Bend Quilters Collective. Quilts from recent years, and quilts from as far back as 1930, have been exhibited in museums and sold for as much as $20,000. The quilts have become so famous that they were featured in a series of postal stamps in 2006.
Image credit: University of Alabama at Birmingham
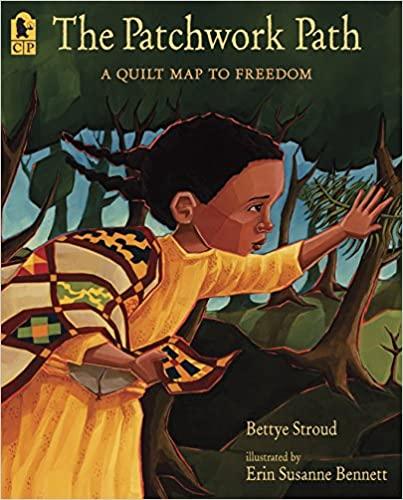
This book gently tells the harrowing story of a young girl and her father escaping slavery. They travel via the underground railroad as they leave behind a Georgia plantation in order to find freedom in Canada. All the while, the young girl carries a quilt her mother made for her. There are secret messages hidden in the symbols of the quilt that will lead them to the safety of the North. Read this one with elementary children.
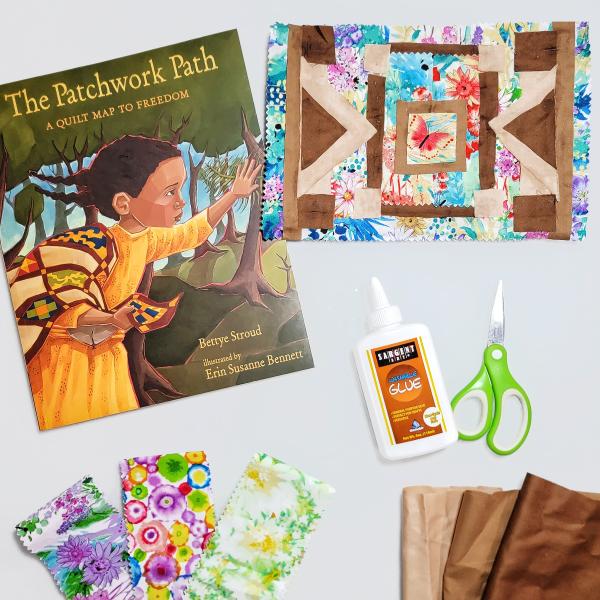
Kids can create a colorful quilt without a needle and thread!
What You’ll Need:
Cardboard, Fabric scraps, Scissors, Glue
What You’ll Do:
1. Cut the fabric into different shapes and sizes like squares, rectangles, and triangles. Make some thick and some thin, some big and some small.
2. Arrange the fabric on your cardboard. Move the pieces around and see what looks best! You can even layer some of the pieces. For the best appearance, you’ll want to cover all of the cardboard.
3. Glue the fabric to the cardboard. Let it dry and then display the quilt!