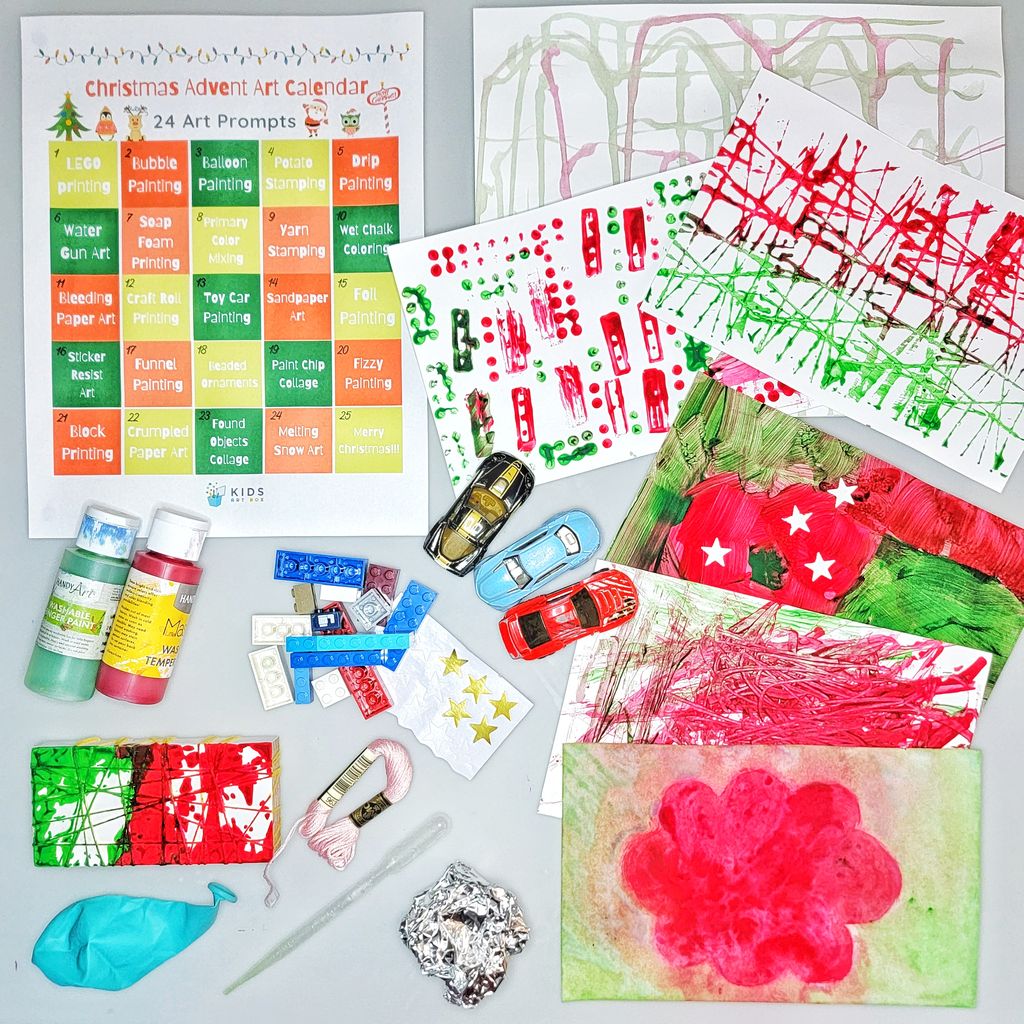
‘Tis the season for creating and connecting with your children! To help take the planning and the stress out of the season, we’ve put together an advent art calendar that you can download for FREE! Each of the 24 projects requires very minimal planning and very few supplies. It’s all about bonding with your children and letting their creativity take the lead. This blog contains the supply list and instructions for each activity. Bookmark it for easy access in December!
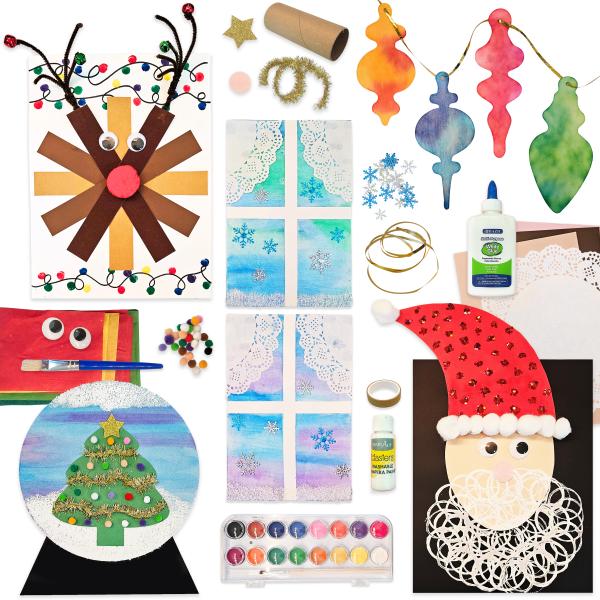
You might also like this!
Start by downloading the FREE advent art calendar. Print it out or keep it saved on your phone so you can do each day’s activity.
For every project, we recommend using an art tray or an old baking sheet as a workstation. This helps contain the mess and can help save your table from damage. But, just in case, have paper towels or an old rag nearby to wipe up spills and messy hands!
As you use this calendar, keep in mind that every project is a process-oriented project. This means that there are general instructions for the project, but children do not have to follow a strict set of steps in order to complete the activity. Imagination, creativity, and experimentation are all more important than the final piece looking a certain way.
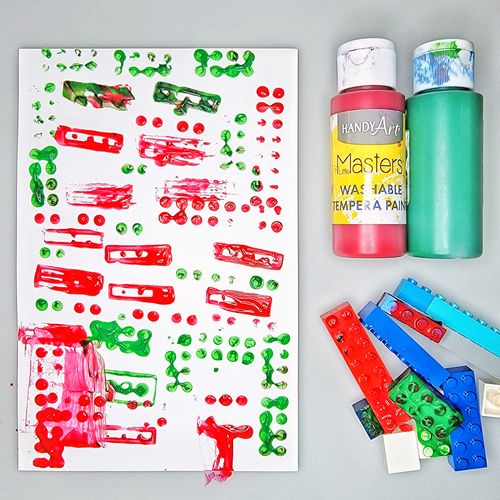
Day 1: LEGO Printing
Gather Supplies
Legos, tempera or acrylic paint, and paper
Create
Pour a few colors of paint onto a paper plate. Children can dip one side of a LEGO into the paint and then stamp it onto the paper. Experiment with different LEGO shapes!
Day 2: Bubble Painting
Gather Supplies
Liquid watercolor, liquid bubble solution or dish soap, water, straws, bowls, and paper
Create
- Reserve one bowl for each color of watercolor you’d like to use. Add ½ cup of water to each bowl. Mix a generous amount of bubble or dish soap into each and then add paint. Stir with the straws.
- Blow through the straw to make bubbles until they overflow the bowl! Important: make sure your little one does not swallow the bubble mix or soap. If you think they might, use a bubble wand instead so they can blow bubbles onto the paper.
- Take one of your sheets of paper and lay it on top gently so that the bubbles will print onto the paper. Repeat as many times as you’d like!
Day 3: Balloon Painting
Gather Supplies
Balloon, tempera or acrylic paint, and paper
Create
Pour a bit of paint onto a paper plate. Use a few different colors if you’d like! Blow up a balloon to a size that your child will be able to handle. Encourage your children to press the balloon into the paint and then stamp it onto the paper.
Day 4: Potato Stamping
Gather Supplies
Knife, permanent marker, potatoes, tempera or acrylic paint, and paper
Create
Before the children begin to participate, an adult should cut the potato in half. Then, use a permanent marker to draw a design in the flesh of the potato. With a knife, cut out the flesh that surrounds the shape. This will make the shape raised like a stamp! You can also push a small cookie cutter into the potato and cut around it to create the shape.
When you’re ready, simply pour paint onto a paper plate and encourage your children to use the potato as a stamp!
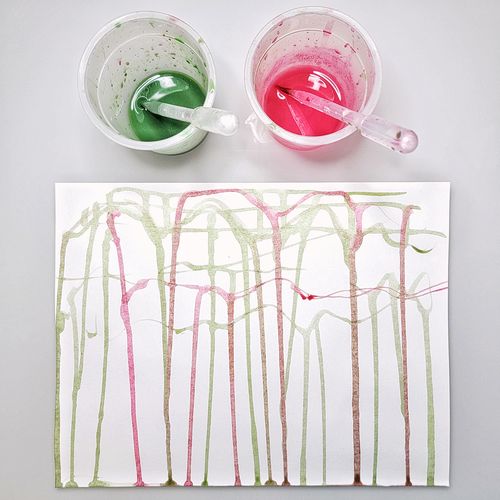
Day 5: Drip Painting
Gather Supplies
Tempera or liquid watercolor paint, jars, spoons, paintbrushes, droppers, and paper
Create
Add your paint to individual jars. Add a spoon, paintbrush, and/or dropper to each one.
Place your paper on an easel or tape it down in an art tray. Using an easel, children can add a bit of paint near the top edge of the paper and watch it drip down. If you're using an art tray, drop some paint at the top of the paper and then pick up the art tray and tip it to make it flow.
Day 6: Water Gun Art
Gather Supplies
Water gun, easel, large craft paper, and liquid watercolor paint
Create
This is an outdoor activity! Place the craft paper on the easel. Fill the water guns with liquid watercolor and let your children shoot the paper with paint!
Day 7: Soap Foam Printing
Gather Supplies
Foam soap dispenser, dish soap, liquid watercolors, and watercolor paper
Create
Fill the soap dispenser about ¾ full with water. Add a few tablespoons of soap and a few tablespoons of liquid watercolor. Screw the lid closed and shake the bottle. Do as many colors as you’d like!
Place the paper on an art tray. Encourage your child to squirt out the soapy paint! They may also want to use their hands to swirl the paint around on the paper.
Day 8: Primary Color Mixing
Gather Supplies
Tempera or acrylic paint in red, blue, and yellow, paintbrushes, and paper
Create
Tempera or acrylic paint in red, blue, and yellow, paintbrushes, and paper
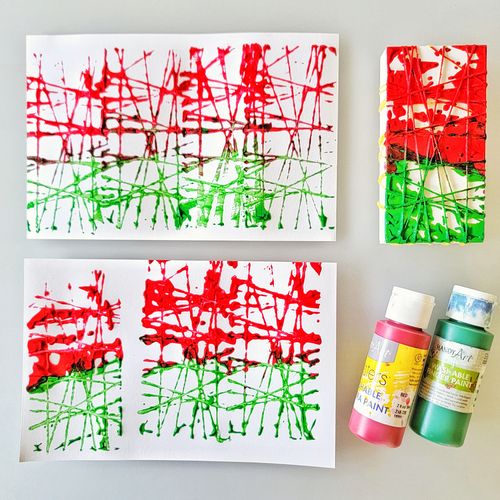
Day 9: Yarn Stamping
Gather Supplies
Wood block or cardboard square to wrap yarn around, yarn, tempera or acrylic paint, and paper
Create
Help your child wrap yarn around a wood block or a cardboard square. (If you use cardboard, you may find it helpful to cut notches to hold the yarn in place.) Pour a few paint colors onto a paper plate and use the yarn block as a stamp. Make a few different sizes of blocks and wrap the yarn in different ways to add some variety!
Day 10: Wet Chalk Coloring
Gather Supplies
Chalk, water, bowl, and watercolor paper
Create
Pour a bit of water into a bowl. Children can dip the tip of the chalk into the water and then draw on the paper with it. Continue to dip and draw until the piece is finished!
Day 11: Bleeding Paper Art
Gather Supplies
Bleeding tissue paper, water, paintbrush or spray bottle, and watercolor paper
Create
Start by ripping or cutting the bleeding tissue paper into small pieces with your child. Then, paint or spray the entire piece of paper with water. Set the tissue paper pieces on top in any design you’d like. Add another layer of water on top. Set it aside to dry. When it’s dry, you can remove the tissue paper and discard it.
Day 12: Craft Roll Painting
Gather Supplies
Craft rolls or empty paper towel rolls, tempera or acrylic paint, and paper
Create
Pour several paint colors onto a paper plate. Use the end of the craft roll as a stamp. You can also cut slits or other shapes all the way around the roll and fray them out to get a unique kind of stamp! Or, squish the end of the paper towel roll into a different shape!
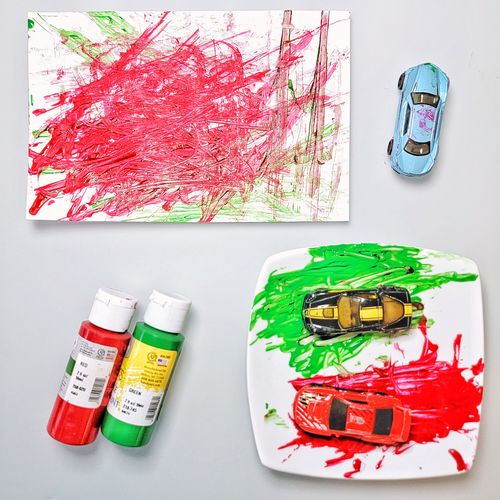
Day 13: Toy Car Painting
Gather Supplies
Toy cars, tempera or acrylic paint, and paper
Create
Tape the paper onto an art tray. Pour several paint colors onto a paper plate. Run a car through the paint and then run it across the paper. It’s like a stamp in motion!
Day 14: Sandpaper Art
Gather Supplies
Oil pastels and sandpaper
Create
Simply set out the oil pastels and sandpaper, and let your child go! They can test the colors, draw a picture, and experiment with how the sandpaper feels.
Day 15: Foil Painting
Gather Supplies
Cotton swabs, foil, and tempera or acrylic paint
Create
Set a sheet of aluminum foil in your child’s workspace. (You may want to wrap it around a piece of cardboard and tape it for extra stability.) Squeeze a bit of paint onto a paper plate. Encourage your child to use the cotton swabs to paint on the foil.
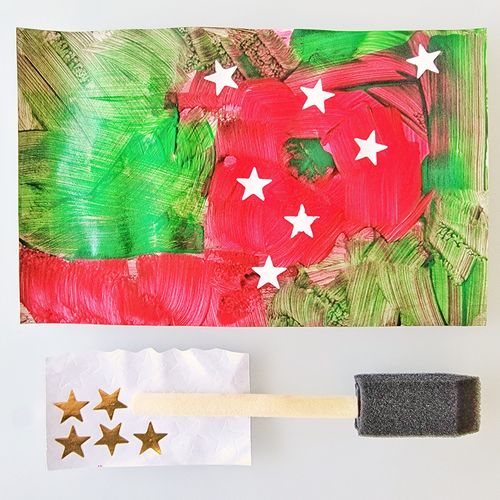
Day 16: Sticker-Resist Art
Gather Supplies
Stickers in a variety of basic shapes, tempera or acrylic paint, paintbrushes, and cardstock or watercolor paper
Create
When you place stickers on a paper and paint over them, the area they are covering remains white. You can use stickers of all shapes like circles, stars, and squares. Simply paint over the stickers. When the paper is dry, carefully remove the stickers to reveal the white space.
Day 17: Funnel Painting
Gather Supplies
Funnel, tempera or acrylic paint mixed with a little water, jars, and paper
Create
Dilute your paint in individual cups or jars. Set the paper in an art tray. Hand your child the funnel and instruct them to hold it above the paper. Pour in the colors they request, and your child can move the funnel all around above the paper.
Day 18: Beaded Ornaments
Gather Supplies
Beads and craft wire
Create
Cut a long piece of craft wire. Add one bead and twist the wire over it so it acts like a stopper. Encourage your child to thread beads onto the wire. When they’re about five or six inches from the end, create another stopper bead. Encourage the child to roll up the wire so it forms a ball or a wreath shape. Bend the extra wire to create a hook for hanging it on the Christmas tree.
Day 19: Paint Chip Collage
Gather Supplies
Paint chips, scissors, hole punchers, glue, and paper
Create
Gather paint chips in a variety of colors for a bright piece of art or opt for reds and greens in honor of the Christmas season. Cut the paint chips into various shapes and sizes or use hole punchers. Arrange the pieces on paper. Children can do an abstract design or make festive shapes like Christmas trees, lights, stars, snowflakes, and the like.

Day 20: Fizzy Painting
Gather Supplies
Baking soda, vinegar, tempera or acrylic paint, jars, paintbrushes, pipette, and watercolor paper
Create
Squeeze paint into jars and add about two tablespoons of baking soda per jar. Mix well. Use the mixtures to paint the paper. Pour vinegar into a small jar. Your child can use a pipette to suck up the vinegar and drop it onto the paint. It will magically fizz!
Day 21: Block Printing
Gather Supplies
Wood blocks in different shapes and sizes, tempera or acrylic paint, and paper
Create
Pour paint onto a paper plate and dip one side of a wood block into it. Stamp it onto the paper. Encourage your child to explore the texture and shape of each print.
Day 22: Crumpled Paper Art
Gather Supplies
Kraft paper, any type of paint, and paintbrush
Create
Crumple a piece of kraft paper into a ball. Paint the outside creases and wrinkles. Let the ball dry and then open it up. You’ll see a random design created by the paint. If you’d like, ball it up again and paint new creases and wrinkles with a different color.
Day 23: Found Objects Collage
Gather Supplies
Glue, a piece of chipboard or cardboard, and items from around the house like string, bottle caps, newspaper, beads, etc.
Create
Arrange the items on the piece of chipboard or cardboard. Encourage your child to glue them down in any way they’d like!
Day 24: Melting Snow Art
Gathe Supplies
Liquid watercolor, jars, pipettes, snow or crushed ice, and watercolor paper
Create
Pour liquid watercolor into jars and have children use pipettes to drop puddles onto the watercolor paper. Then sprinkle snow or crushed ice on top. As it melts, the colors will spread and blend together. If you’d like to speed up the process, put the paper in an art tray and place it near a sunny window. Or, use a hair dryer!