The Festival of Lights is just around the corner! This year, you can use our list of Hanukkah art projects for kids to make crafting part of your family celebrations. Our collection includes creative and easy-to-follow DIY projects that will keep your kids engaged and excited during this special holiday season. Plus, most of these projects are quite sturdy, so you’ll be able to use them as Hanukkah decorations year after year!
You might also like this!
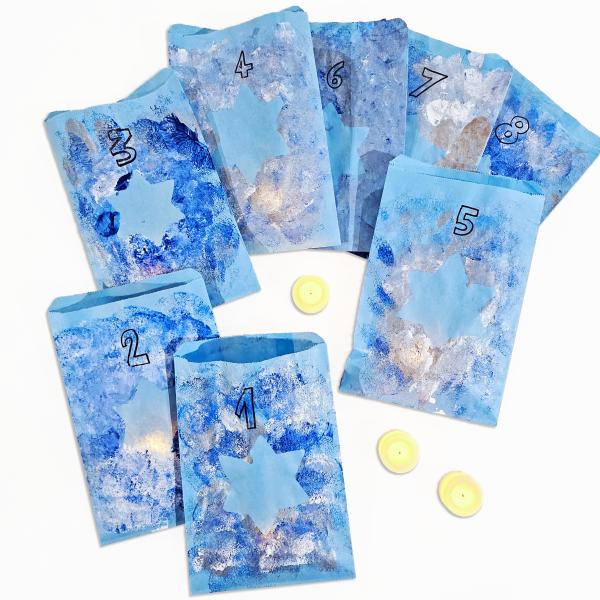
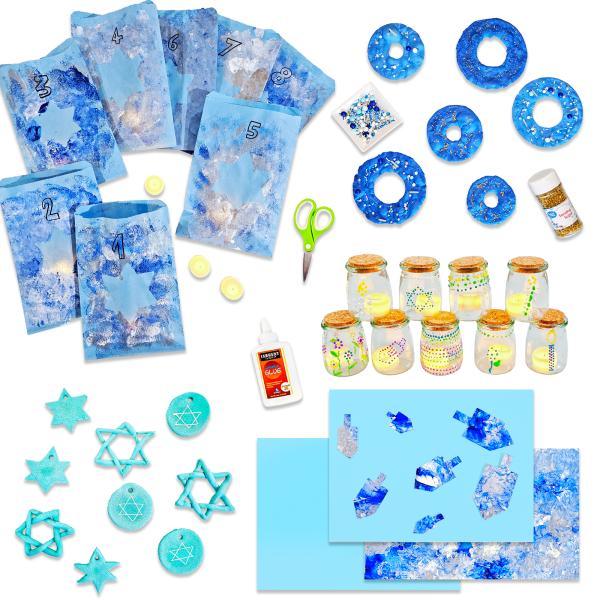
Download the FREE Hanukkah countdown packet and use it to create paper bag lanterns that celebrate the eight nights of Hanukkah.
What You’ll Need
- FREE Hanukkah countdown packet
- Scissors
- 8 paper bags
- Painter’s tape or washi tape
- Sponge paint dabbers or a clean kitchen sponge cut into three-inch pieces
- Blue paint (having a two or more shades of blue will look best)
- Paper plate or paint palette
- Blue or black marker
- 8 battery-operated tea lights
What You’ll Do
1. Download and print the FREE Hanukkah countdown packet. Cut out the stars.
2. Place loops of tape on the back of the stars you wish to use and press them onto the first paper bag.
3. Squeeze blue paint onto a paper plate or paint palette. Dip a sponge into the paint and stamp in on the paper bag. You can stamp all around the stars. It’s even okay to get paint on top of the stars. But, be careful not to get paint under the stars.
4. Remove the stars and press them onto the second bag. Paint with sponges and blue paint. Repeat this process until all of the bags are painted. If the stars get bent or too wet with paint, print and cut out new stars.
5. Set the bags aside to dry.
6. Use a blue or black marker write "1" on the first bag, "2" on the second bag, and so on. If you make "bubble" numbers, you can color in the number or add a design if you’d like.
7. Stand up the bags and place them in order. Place one tea light in each bag. You can also make up your own activity for each day, write it down, and put it in the bag.
8. On each night of Hanukkah, open each bag, light the candle, and do the activity.
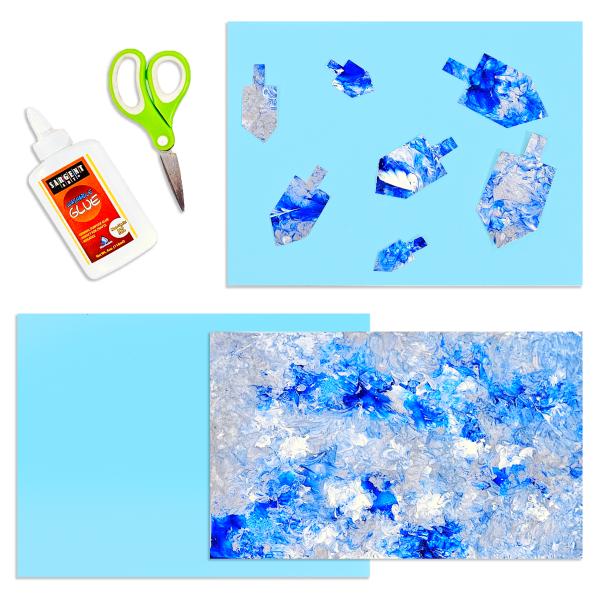
Squish painting is the ultimate sensory experience for kids! Plus, with the FREE dreidel template, kids can use this process-art technique to design a memorable piece of Hanukkah art.
What You’ll Need
- FREE dreidel template
- Scissors
- 4 pieces of thick white cardstock
- A variety of paint (blue, gold, silver, and white work well)
- Plastic wrap
- Canvas or large piece of thick paper
- Glue
- Pencil
- Paintbrush
What You’ll Do
1. Lay one piece of cardstock on a covered workspace or on an art tray.
2. Squeeze small dots of paint all around the cardstock.
3. Tear off a piece of plastic wrap that’s a bit bigger than your cardstock. Carefully set it directly on top of the cardstock and paint. Then place your fingers on top and gently squish the paint around. Squish the paint until most of the white cardstock is covered.
4. Pull off the plastic wrap and discard it.
5. Tear a piece of plastic wrap and scrunch it into a ball. Use it to stamp the paint that’s already on the canvas. If you need more paint, squeeze the paint onto a paper plate or paint palette. Then dip the ball of plastic wrap into it and stamp it on the paper.
6. Repeat the process for each piece of cardstock. Then set them aside to dry.
7. If you’d like, paint your canvas or large piece of paper blue. If you’d like to leave it white, that will look nice too.
8. While the paint is drying, print the FREE dreidel template. Cut them out.
9. Once the squish painted papers are dry, use a pencil to trace the various sizes of dreidels on the back of the paper. Then cut them out.
10. Arrange the dreidels on your canvas or large piece of paper. You can keep them all in a row or use a random arrangement—do whatever looks best to you! Once you’re happy with the arrangement, glue the dreidels to the background and let it dry.
11. Display your artwork!
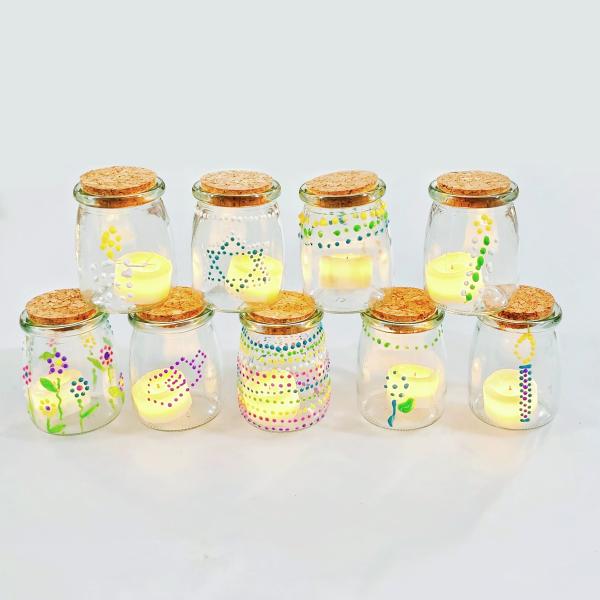
Young artists can transform recycled glass jars into a festive menorah with this Hanukkah art project for kids!
What You’ll Need
- 9 small jars (baby food jars, yogurt jars, or small mason jars work well)
- Rubbing alcohol
- Cotton balls
- Puffy paint (store-bought paint works best for this project)
- Gems
- 9 battery-operated tea lights
What You’ll Do
1. Begin by cleaning each jar. Soak a cotton ball with rubbing alcohol and rub it all over the glass surface. This will help the paint adhere.
2. Decorate the jars with puffy paint. Keep it abstract or use a design!
3. Add gems as you paint. No need for glue—the gems will stick to the puffy paint.
4. Let the jars dry for at least 24 hours.
5. Arrange the jars in a row like a menorah. Set a tea light in each jar. Turn on the light in the center jar each night of Hanukkah and add an additional jar each night, as well.
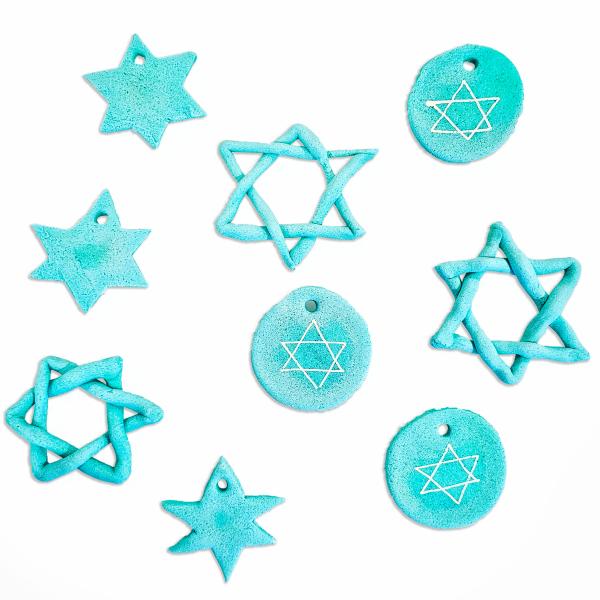
This Hanukkah art project is part baking, part crafting! Working with salt dough is a fun activity for kids of all ages. Once your garland is complete, it will last for several years to come!
What You’ll Need
- Mixing bowl
- ½ cup salt
- ½ cup flour
- ¼ cup water
- Spoon
- Blue food coloring
- Baking sheet
- Parchment paper or silicone baking mat
- Paintbrush and paint (optional)
- Twine
What You’ll Do
1. Before beginning, an adult should preheat the oven to 200° F.
2. In a large mixing bowl, stir together the salt and flour. Add about half the water. Mix well. Add more water, as needed, and bring the dough together with your hands.
3. Add a few drops of blue food coloring to the dough and mix it in with your hands.
4. Grab a small ball of dough and roll it on the table until it becomes a long rope.
5. Pinch the rope in the middle so you have two equal ropes. Use them to make a Star of David! Form the first rope into a triangle and pinch the ends together. Form the second rope into a triangle and set it on top of the first triangle, orientated upside down. Gently pinch the places the two triangles touch so they’ll stay attached. Transfer the Star of David onto a baking sheet lined with parchment paper or a silicone baking mat.
6. Continue to make more Star of David shapes until you’ve used all the dough. You can also use cookie cutters to cut the dough.
7. (ADULTS ONLY!) Bake the salt dough in the oven for about three hours. Remove the baking sheets and let them cool completely.
8. If you’d like, add color by painting the shapes with watercolor, acrylic, or tempera paint.
9. String the shapes on a long piece of twine, knotting each one in place. Then hang the garland in the window or on your fireplace mantle!
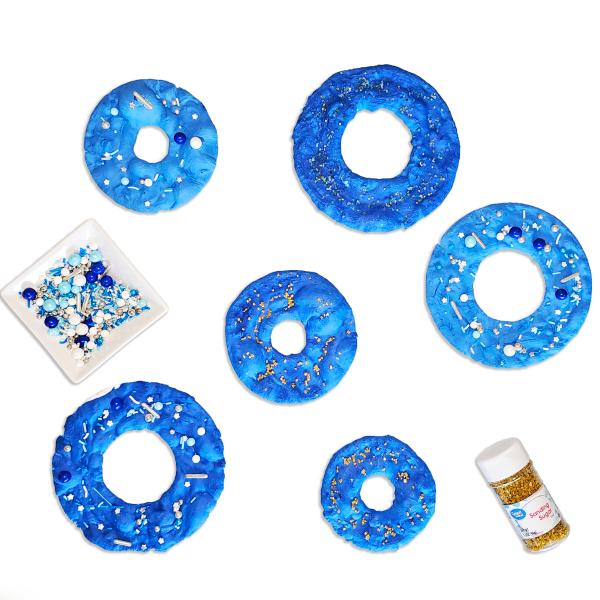
This is the easiest sufganiyot recipe you’ll ever make! Cut donut shapes out of old cereal boxes, mix up some puffy paint, bake it in the microwave, and add a few sprinkles. You’ll get colorful donuts that will bring cheer to your home throughout the entire Hanukkah season!
What You’ll Need
- Empty cereal boxes
- Tracing objects to make a donut shape - one small round object and a very small round object that will go in the middle
- Scissors
- Pencil
- Mixing bowl
- 1 cup flour
- 3 teaspoons baking powder
- 1 teaspoon salt
- 1 cup water
- Food coloring
- Spoon or craft stick
- Paper plate
- Glue
- Paintbrush
- Glitter or sprinkles
What You’ll Do
1. Tear apart the empty cereal boxes so they lay flat. Turn them so the blank side is facing up. Trace the larger round object several times and trace the smaller round object in the middle of each one. Now you have donuts!
2. Cut out the donuts. To cut out the center hole, fold the donut in half and cut a slit in the center circle. Then you should be able to insert your scissors and cut your way around the circle.
3. Now mix up your puffy paint! Stir together the flour, baking powder, and salt in a medium-sized mixing bowl. Then begin stirring in the water. Only add half of the water at first. Then continue adding it bit by bit until your mixture is the consistency of a thick batter.
4. Add food coloring to your mixture. You can use blue for Hanukkah or a light red for the jam in sufganiyot. If you’d like to create multiple colors, pour the batter into smaller bowls and mix a new shade in each bowl.
5. Place a donut on a paper plate. Use a spoon or a craft stick to apply the puffy paint to the donut.
6. Microwave the donut for 30-45 seconds. Watch the paint puff up!
7. Squeeze a bit of glue onto the donut and spread it with a paintbrush. Sprinkle glitter or sprinkles on the glue. Set aside to dry.
8. Display your artwork!