Shark Week has become a summertime tradition that both kids and adults look forward to! At Kids Art Box, we’re celebrating this thrilling time of year with Shark Week crafts for kids. These crafts highlight the beauty of sharks and the importance these creatures play in the marine ecosystem. Plus, we’ve created FREE printable templates for two of these craft projects, so getting started is quick and easy. Pick one craft for each week of July or do one craft each day during Shark Week. And, when you're done crafting, don't forget to check out our list of 15 books about sharks! Grab your supplies and let’s get started!
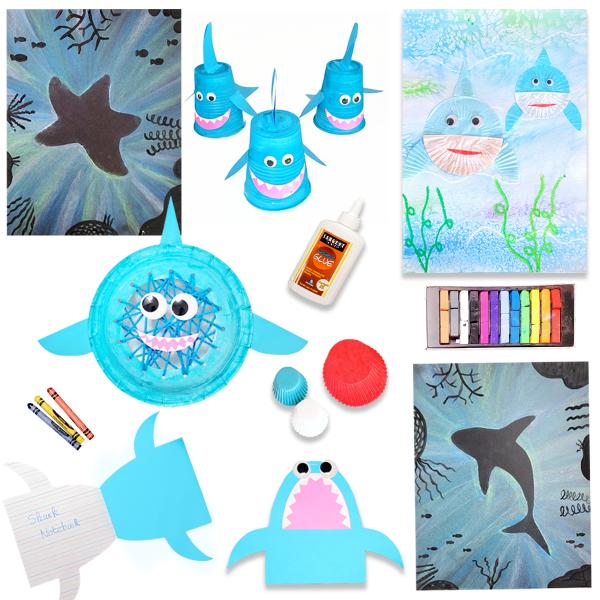
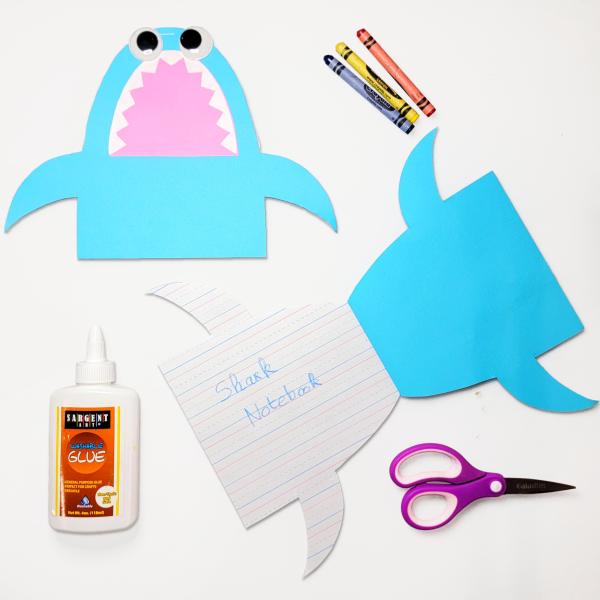
Kids can record all of their summer adventures in this jaw-some notebook!
What You’ll Need
- FREE Shark notebook printable template
- 1 piece of construction paper to be the shark’s body
- Small pieces of red, white, and pink paper to be the mouth
- Small piece of black paper to be the belly
- White paper
- White crayon
- White glue or glue stick
- Scissors
- Pencil
- Googly eyes
- Stapler
What You’ll Do
1. Print the shark notebook template and cut out all of the pieces.
2. Grab the piece of construction paper that will be the body of your shark. Fold it in half like a book and rotate the paper so the fold is at the top.
3. Lay the body template on the piece of construction paper with the tip of the shark’s nose sitting directly on the fold of the construction paper. Trace it. Lay the two fin templates on either side of the body. Trace them. Cut out the shark as one big piece. DO NOT cut the fold where the shark’s nose sits. This is how your notebook will stay together!
4. Fold three or four pieces of white paper like a book. Be sure the fold of the white paper sits at the top. Trace the shark body on top of the white paper. (Don’t add fins.) Cut it out. Again, DO NOT cut the fold at the top where the shark’s nose sits.
5. Open up the shark’s body and set the folded white paper inside. Close the top of the notebook. Put a staple at the shark’s nose to hold it all together.
6. Now make the shark’s mouth! Start by tracing the mouth piece onto your pink paper. Cut it out. Trace the mouth on your white paper. Draw a row of teeth inside this mouth and cut it out. Glue the teeth onto the pink mouth. Trace the tongue template on your red paper, cut it out, and add it at the bottom of the mouth. Glue the mouth onto the middle of the shark notebook.
7. Trace the belly piece on your black paper, cut it out, and glue it near the bottom of the notebook. Write your name on it with a white crayon, if you’d like!
8. Add your googly eyes and your first Shark Week craft is complete!
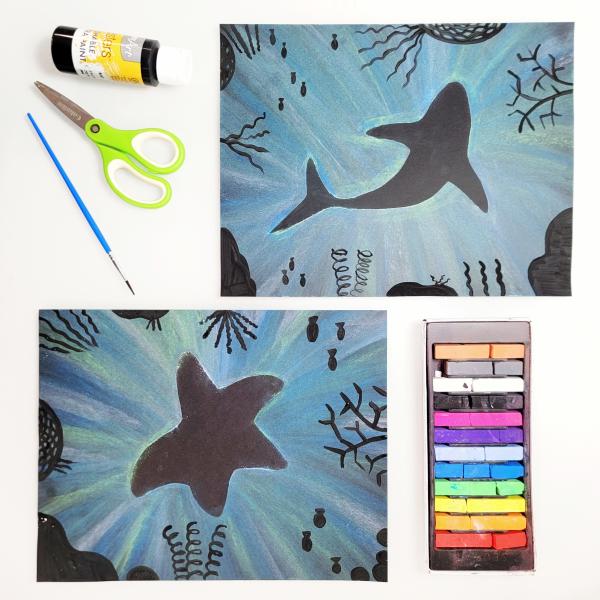
Kids can create a piece of mysterious art that celebrates the underwater world of sharks!
What You’ll Need
- FREE download of ocean creature silhouettes
- Scissors
- Tape (painter’s tape or washi tape works best)
- Black paper
- Oil pastels
What You’ll Do
1. Download and print the ocean creature silhouettes. Cut out the silhouettes you want to use.
2. Loop a few pieces of tape and put them on the back of your silhouettes. Press the silhouettes onto the black paper.
3. Draw around the silhouettes with oil pastel. Use blue, green, and white for an ocean effect. For the best results, you’ll want to make sure your colors go right up to the edge of the silhouettes but don’t get under the silhouettes.
4. Once you have a bit of color on the black paper, you can smudge it and smear it with your finger or with a dry paper towel.
5. When you’re finished with the oil pastels, remove the silhouette and reveal the blank space beneath it!
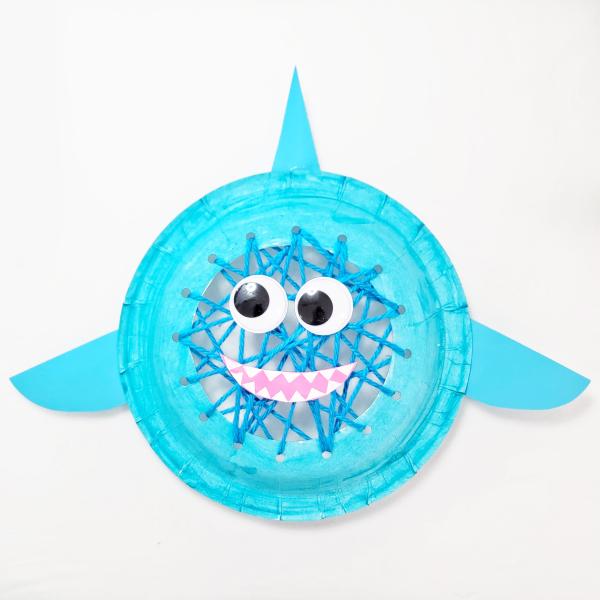
Kids can transform ordinary paper plates into fierce and fin-tastic ocean predators!
What You’ll Need
- Paper plate (the basic white ones work best)
- Pencil
- Bowl to trace (This should fit in the center of your paper plate and leave a border that’s a few inches wide.)
- Scissors
- Paper punch
- Blue or gray paint
- Paintbrush
- Yarn
- Googly eyes
- Glue
- Transparent tape
- Craft stick (optional)
- Hot glue (optional - ADULT USE ONLY!)
What You’ll Do
1. Set the bowl in the center of your paper plate. Trace it and cut out the circle.
2. Paint the outer ring with blue or gray paint. Set it aside to dry.
3. On the inner circle, draw a one-line smile that sits about two inches above the bottom and runs across the entire circle. Now, draw a tall triangle that runs from the smile to the top of the circle. It should be about two inches wide. Once you’ve drawn these lines, you’ll see that you’ve created a triangle (the shark tail), two curved side pieces (the shark fins), and a moon shape at the bottom (the shark mouth). Cut out each piece.
4. Take the moon-shaped piece and cut several teeth into the bottom edge of it.
5. Paint the other pieces with your blue or gray paint. Set them aside to dry.
6. Once the outer ring is dry, use a paper punch to create several holes around the ring. Try to space them evenly.
7. Cut a piece of yarn. (Shorter pieces work best for little kids.) Thread it through one hole and onto the back of the paper plate. Knot it and tape it in place on the back.
8. Randomly thread the yarn in and out of the holes so it criss-crosses all over the plate. Add additional pieces of yarn as needed. Weave as much as you’d like! When you’re finished, thread the yarn to the back of the paper plate, knot it, and tape it down.
9. Once the shark pieces are dry, glue them to the paper plate ring. You can glue the googly eyes and shark mouth directly on top of the yarn.
10. If you’d like to play with this shark week craft, have an adult use hot glue to attach it to a craft stick. Now you can use it like a puppet!
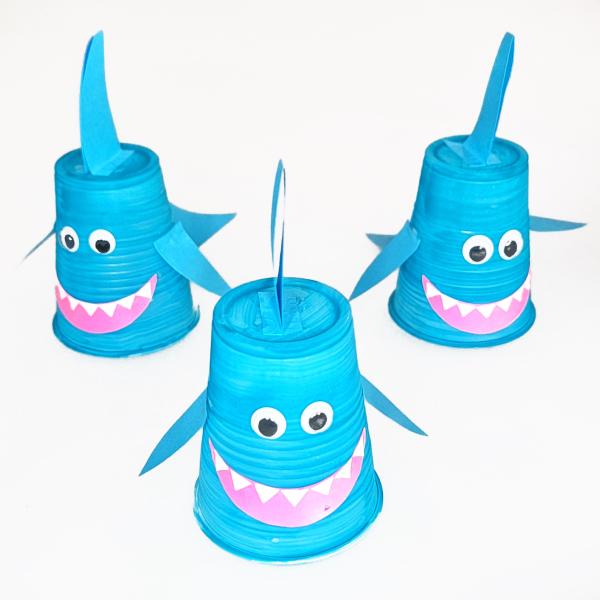
Need an easy Shark Week craft? Here’s the perfect one for your family!
What You’ll Need
- Paper or plastic Cups – any size
- Blue, white, and pink cardstock
- Googly Eyes
- White glue
- Light blue tempera paint
- Paintbrush
- Scissors
- Pencil
What You’ll Do
1. Using light blue paint, paint the outside of your cup. Let dry.
2. Once dry, draw 2 identical shark fins for the top of the shark and 2 fins (1 for each side) on the blue cardstock. Then, cut your fins out.
3. Cut out a shark tail out of blue cardstock for the back.
4. Make a mouth and teeth using the white and the pink cardstock. Glue the teeth onto the mouth.
5. Take the paper cup and flip it upside down. This will be the shark's body. Add two googly eyes to the painted cup and glue the mouth underneath.
6. Glue the shark's dorsal fin! Place the two fins one on top of the other, fold each end (the bottom end) in opposite direction, then glue the folded part to the top of the cup.
7. Allow the glue to dry completely. Once the glue is dry, your cup shark craft is ready! You can now play with your shark or use it as a decorative piece.
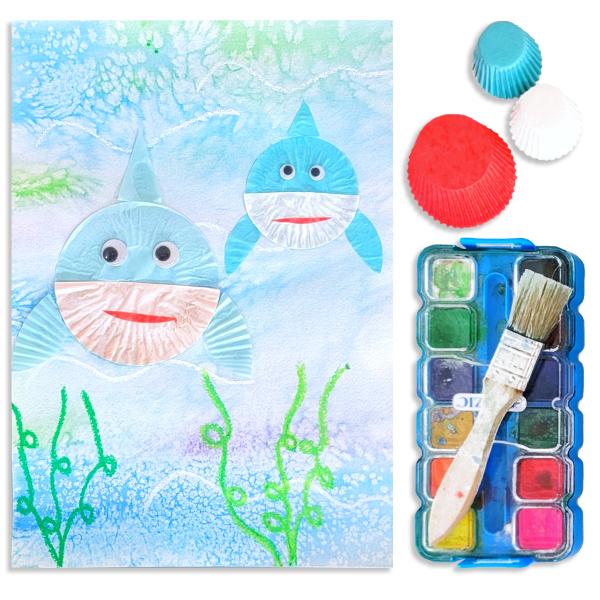
Make this craft with your kids and then sing the song together!
What You’ll Need
- Watercolor paper
- White oil pastel
- Watercolor paint
- Paintbrush
- Salt (table salt or kosher salt)
- Cupcake liners (blue or gray, red, and white)
- White glue or glue stick
- Scissors
- Googly eyes
What You’ll Do
1. Use a white oil pastel to draw waves on the white paper.
2. Use watercolors to paint an ocean scene and reveal the white waves through the magic of paint-resist!
3. Sprinkle salt over the wet paint to add texture. Set it aside to dry.
4. Once the background is dry, hold it over a sink or trash can and shake off the excess salt.
5. Glue one blue or gray cupcake liner flat on the ocean background paper. Fold a white cupcake liner in half and glue it to the lower half of the blue/gray liner. Cut another blue/gray cupcake liner into three triangles. Glue them on as two fins and one tail. Cut a piece of red cupcake liner to be the mouth. Glue it on top of the white cupcake liner. Add googly eyes.
6. Repeat step four to make the baby shark. Trim the cupcake liners before gluing them so that this shark is a bit smaller.